Back in the 1970s, cork flooring was all the rage in homes across North America. And now, it’s making a stylish comeback!
One of the primary benefits of cork flooring installation is that it’s an easy and cost-effective process. While cork flooring comes in a variety of forms, the most common in residential applications are glue-down tiles and floating floors. Whichever approach you take, we at Deerfoot Carpet & Flooring have created this detailed guide to ensure a smooth cork flooring installation process.
Material Guide for Cork Flooring Installation
Along with your tiles ordered from your chosen cork flooring company in Calgary, below is a list of the necessary tools that you’ll need for your project:
- Graph paper
- Chalk
- Utility knife
- Tape measure
- Rubber mallet
- Tapping block
- A saw or tile cutter
- Floor roller
- Sandpaper
- Vacuum
- Drywall sander
- Floor finish
If you are using glue-down cork tiles, there are two types of adhesives to use: contact cement and mastic. We recommend purchasing extra adhesive to avoid an extra trip to the store during the cork flooring installation stage.
Planning For Cork Flooring Installation
A great cork flooring installation starts with a solid plan. Taking the time to prep properly will make the entire process smoother and the final result much more polished.
Start by measuring your space and sketching out your layout on graph paper. It doesn’t have to be fancy—just clear enough to guide you. Once you find the center of the room, snap chalk lines to mark where your cork tiles will go. This helps you line everything up neatly from the beginning.
Depending on your room’s shape and size, you might need to trim a few tiles to fit just right.
Quick tip: Careful planning not only saves time during installation, but it also helps you achieve that clean, professional look that cork flooring is known for.
Preparing Your Subfloor For Cork Flooring Installation
Cork must be installed on a flat, smooth surface. They are not to be installed over plank flooring, vinyl, or linoleum. If you are installing them over existing flooring, you’ll need to first fix a plywood underlayment of at least 1/4 inch thick over top.
Any surface that is not completely smooth must be sanded and de-waxed before installing cork flooring as the cork tile will contour to uneven areas in the subfloor. Residue from pre-existing floor can be entirely removed by scraping, using a heat gun, or a special solvent. The subfloor needs to be completely dry before applying cork flooring.
Important Disclaimer: If your home was built before 1980, there may be asbestos in the tiles or adhesive, which can be hazardous if it becomes airborne. Before removing any old flooring, call your local health department for safe removal and disposal.
Installing Cork Flooring
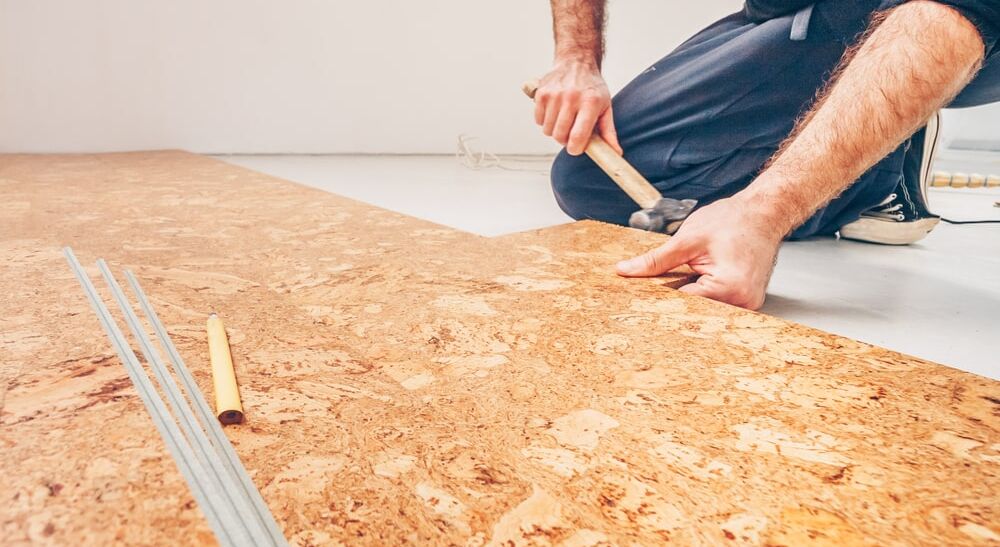
Begin installation by placing the cork tiles lengthwise along a wall. With floating cork flooring that locks together, place the tapping block over the tile to protect the surface. Using a rubber mallet, tap the block to lock the tile into place.
With glue down tiles, follow the same procedure and use the proper adhesive to secure the tiles. Cork expands and contracts as the weather fluctuates, so it’s important to allow for about 1cm of extra space around the walls.
Sand And Finish Cork Flooring
Once the installation of your cork tiles is complete, pass a floor roller over the surface to secure the tiles. Using 100-grit sandpaper followed by 150-grit sandpaper with a drywall sander, sand any high spots or ridges and carefully vacuum the residue.
To finish your cork flooring, apply two to three coats of a waterborne or oil-based polyurethane flooring finish. What you’re left with is a new, beautiful cork floor.
Is Cork Flooring Worth It?
Most cork flooring indeed comes from Portugal, and yes, it can be more expensive than other options. That’s something to keep in mind when planning your budget.
But many homeowners in Calgary still see it as a worthwhile investment. Cork offers comfort underfoot, natural insulation, sound absorption, and a warm, modern look that holds up well over time.
If you’re after something durable, sustainable, and a little different, cork might be worth the extra cost.
The Comeback of Cork
When it comes to caring for cork flooring, a little routine goes a long way. Sweep or vacuum regularly to keep dust at bay, and once a week, mop gently with warm water and mild dish soap or a neutral cleaner using a microfibre cloth or sponge.
That’s all it takes to keep your floors looking fresh and feeling great!
If you’ve enjoyed our guide to cork flooring and you’re ready to explore styles, finishes, or need expert advice, book an appointment with us at Deerfoot Carpet & Flooring so our team of experts can help start planning your perfect floor!


